 Productivity is the key to success. Period. I’ve always believed that a person with average intelligence who is organized will be more successful than a genius who is disorganized. Why? Organized people simply get things done and reach their goals. Geniuses may have great ideas – and probably lots of them – but they often get swallowed up in distractions and miss opportunities to realize their dreams.
In the article “10 Uncommon Habits of Extraordinarily Productive People“, I like Jeff Haden’s recommendation to let go of things you do because of your ego or to stop striving to reach the extra 5% to be the best. Seem counterintuitive? The garden doesn’t have to be weed free; besides, when the weeds are bigger, they’re easier to pull! Doing things to stroke your ego or to be the extreme perfectionist will waste your valuable time for little ROI (return on investment).
He also suggests ways to say “no” to other time wasters like invitations to parties or social events that you don’t want to go to. You know the ones, your receptionist’s baby shower! I’m guilty of that – I seem to get pulled into outings that take me away from things I enjoy doing – like planting herb gardens!
I like his suggestion of setting time limits on social media – what might seem like a few minutes often rolls into an hour, or more, several times per day, and you somehow end up on the Wikipedia page for a weird marsupial and who really has time to get caught up in all that? I’ve set my social media and news reading to just one hour every morning – it’s like my cup of coffee as I wake up and lie in bed.
And my favorite habit: delegate tasks to others! Sometimes the old idiom: “If you want something done right, do it yourself” isn’t the best advice when you are trying to be productive.

Productivity is the key to success. Period. I’ve always believed that a person with average intelligence who is organized will be more successful than a genius who is disorganized. Why? Organized people simply get things done and reach their goals. Geniuses may have great ideas – and probably lots of them – but they often get swallowed up in distractions and miss opportunities to realize their dreams.
In the article “10 Uncommon Habits of Extraordinarily Productive People“, I like Jeff Haden’s recommendation to let go of things you do because of your ego or to stop striving to reach the extra 5% to be the best. Seem counterintuitive? The garden doesn’t have to be weed free; besides, when the weeds are bigger, they’re easier to pull! Doing things to stroke your ego or to be the extreme perfectionist will waste your valuable time for little ROI (return on investment).
He also suggests ways to say “no” to other time wasters like invitations to parties or social events that you don’t want to go to. You know the ones, your receptionist’s baby shower! I’m guilty of that – I seem to get pulled into outings that take me away from things I enjoy doing – like planting herb gardens!
I like his suggestion of setting time limits on social media – what might seem like a few minutes often rolls into an hour, or more, several times per day, and you somehow end up on the Wikipedia page for a weird marsupial and who really has time to get caught up in all that? I’ve set my social media and news reading to just one hour every morning – it’s like my cup of coffee as I wake up and lie in bed.
And my favorite habit: delegate tasks to others! Sometimes the old idiom: “If you want something done right, do it yourself” isn’t the best advice when you are trying to be productive.
 I generally like to keep this blog pretty low-key, but every once in a while something comes up that makes me want to toot a horn or three. Not for myself, but for some of the kids Merit Academy has helped.
There’s a period of time every year that’s always fraught with tension and anxiety: college admissions. Who’s going to get in where? We fire off a ton of (carefully considered) applications, and then we wait for acceptances (hooray!) or rejections (boo!).
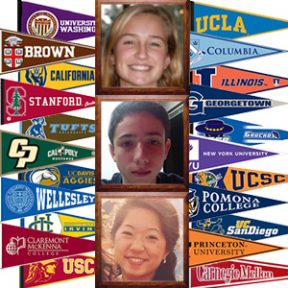
This year, out of many Merit students, I’ve gotten the go ahead from a small sample of 3 to share their names and some of the colleges that accepted them. In no particular order, I want to congratulate Amy Peet, Omar Alhait and Teagan Knight for their hard work and stellar range of acceptances.
Here’s a short list of just some of the colleges Merit students have been accepted to this year:
- Brown
- Claremont McKenna
- Columbia
- Princeton
- Stanford
- Wellesley
- Georgetown
- NYU
- Pomona
- UCLA
- USC
- UCSC
- UIUC
- UCSD
- UCSB
- Carnegie Mellon
- UC Berkeley
- Tufts
- American
- University of Washington

 We need to readjust our priorities in regard to education. Did you know that Big Oil and Big Ag suck up $35 BILLION taxpayer dollars per year?
If we took the $21 billion a year our government gives to BIG OIL and $14 billion to BIG AG in corporate subsidies, we could EASILY provide free college for our kids. And not just community colleges, either.
Our collective priorities are out of whack – oil and the big agriculture conglomerates aren’t hurting for money, so it should be going toward a better future for everyone – EDUCATION.
Check out the original article about Obama’s community college plan here.

 I was diagnosed with diabetes last year after being “prediabetic” for about 5 years. Sure, over the past 5 years, I tried to eat less white flour treats like bread, pasta, and my favorite bagels. I thought I was doing all I could to avoid going over the magic 117 glucose number. Nicole, my daughter who is an Emergency Medicine doctor, told me about her many obese patients who suffered from diabetes and their awful prognoses, which was a huge wake up call! Obviously, I didn’t want to go blind or have my feet amputated (how would I play croquet?). So when my glucose hit 140 last year, I realized that I would need to do something drastic — anything — to fix this.
As you may (or may not) know, I’m a firm believer in Eastern and alternative medicine. So I went to see Dr. Randy Baker, a Stanford MD who practices naturopathy. He recommended I read his colleague’s book “There is a Cure for Diabetes” and go on a strict, raw vegan diet for 3 weeks. But, the notion that “I” would be able to go 3 weeks without my favorite grilled salmon, fresh eggs from our chickens, or my favorite cheeses seemed impossible to me. I felt doomed. DOOOOMED!
But my husband got on board and agreed to do the raw vegan diet with me. And my youngest daughter Jaclyn was doing a similar diet so we commiserated together. So I rid my fridge and pantry of the things I couldn’t eat, and I filled them with organic and raw veggies, nuts, and oils. I eliminated all fruit, soy products (including soy sauce!), processed foods (all grain flours except nut flours), dairy, meat and seafood, and sugars (honey, blue agave nectar, syrups). This almost broke me, but I knew it was just a test. I wanted to see if I COULD cure myself of diabetes via my diet. Because I couldn’t cure myself using my other techniques or even with the meds my western doctor prescribed, I decided to go for it.
I learned how to make vegan pate, pesto hummus, and nut protein bars. Every Sunday, I made my little treats of nuts, pates, dressings, and salads. I think the hardest part was not being able to steam veggies or make stir fries – no cooking allowed! What happened next surprised me.
I felt better almost immediately. By eating whatever I wanted (as long as it was raw vegan) with no restrictions, I felt super-charged. I ate a whole avocado with a spoon! I’d never tried that before — always thought it needed to be between 2 slices of bread with mayo and cheese! I seemed to eat less quantities of food yet felt comfortably full. I did, however, stay away from restaurants that served tempting foods. Our friends still seemed to enjoy healthier meals with us — or at least they didn’t complain! To my surprise, the 3 weeks zipped by quickly.
This morning — exactly 3 weeks later — I pulled out my glucose meter, the device that checks your glucose readings and the lancing device (I really don’t like its name! Sounds like a sword sharp enough to lop off the top of your finger!) that pricks your finger to get a drop of blood. I was excited to see if my glucose levels dropped below the diabetic level, but was terribly fearful of the NEEDLE. Have I mentioned that I don’t like needles? Feeling clever, I decided to use my big toe as a guinea pig. Or guinea toe, I suppose. If I had an appendage that was 20 feet away, I would have chosen that. When I pressed the button (that shot what I thought would be a sword into my toe), nothing happened. I realized that it wasn’t going to be as painful as I had anticipated so I sat down and decided to try my finger. Surprisingly, I didn’t feel it but noticed there was a little blood. I grabbed the test strip and blotched up the job. In a panic, I grabbed the container of test strips and emptied them out on the table (another no-no). I was determined to get every drop of blood from this one stick.
When I read the glucose monitor, I was shocked. I knew I wanted my 140 reading to be below 117, but when I read that it was 55, I was thrilled. I read the small print on the monitor instruction sheet and found that 55 was actually on the low side. I am going to start introducing my favorite foods back into my diet one at a time. I want to understand what foods actually do to my blood glucose. Knowing what I can and cannot eat will give me the will power I need to stay free of diabetes. Oh, and while I was stressing out about my blood glucose levels, changing my diet led to losing 6 pounds, almost by accident! You see, if I can do this, you can too!

 Growing up in LA, I didn’t learn much about agriculture. All I knew about bees was that they made honey, and if you made them mad, they’d sting you! Common sense. Okay, and I also knew that bees get nectar from flowers. But that was about it. I learned the hard way that my fruit and almond trees here in Santa Cruz actually NEED bees for pollination or they won’t produce fruit. I was alarmed to hear that pesticides are killing off bees in startling numbers and I have watched the cost of honey skyrocket.
After talking with friends John and Julie (who were planning on becoming beekeepers), my husband Rob and I were curious about what that would entail. Little did we know then that this would become a huge project. Side note: I’m scared of anything with wings — and especially flying insects that sting — and hesitated about venturing into beekeeping. Just the thought of wearing the bee-gear and being swarmed by bees didn’t sit well with me. But, being a good sport, I joined our friends at an introductory beekeeping class and watched dozens of YouTube videos to learn about the fascinating social stratification of bees. I’ve got to admit that I love the fact that the QUEEN BEE rules the roost and that the male drones’ sole purpose is to procreate and then die. Hmmm. The female worker bees do all of the work. They often forage a whopping (combined) 55,000 miles to collect enough pollen from 2 million flowers just to make one pound of honey!
We bought our hive and painted it to blend into the landscaping. I painted vinca all over the boxes so the bees would be able to easily identify their new home, and Julie painted hers with poppies — we chose the indigenous flower theme. In hindsight, I should have painted poison oak plants because that is what covers most of our property.
[carousel][carousel-item active=”true”] [/carousel-item][carousel-item]
 [/carousel-item][/carousel]
Next we assembled the honeycomb frames that we placed in the hives. They’re made out of beeswax and save the bees the hassle of having to make their own honeycombs. John and Rob built a little retaining wall and platform for the hives. Before I knew it, the guys were buying all kinds of specialty tools and mixing up concoctions of bee food (bees need sugar water during the winter during the dormant period).
[carousel][carousel-item active=”true”] [/carousel-item][carousel-item]
 [/carousel-item][/carousel]
Rob and John took an apiary class last weekend so they got to wear their beekeepers getup and actually work with the bees. Notice I didn’t mention that I was taking the class? Not me! I like my distance. They’re buzzing with enthusiasm (sorry, couldn’t resist!) as they await the arrival of their bees. We won’t harvest any honey this year because the bees will need it to make it through their first winter. That’s another thing I didn’t know. Bees actually eat their honey and need it during the cold months. So we actually steal their honey! No wonder they get mad when we smoke them out of their homes and take the honey.
[carousel][carousel-item active=”true”] [/carousel-item][carousel-item]
 [/carousel-item][/carousel]
So I’m on board. Setting up a bee hive provides much-needed pollination for our fruit trees and we take a small step in saving the bee population. If you live outside of the city limits (don’t try to start a hive in your apartment), you might consider becoming a beekeeper! I’ll post again after we get our bees and harvest our first honey!

 I just read a great article on earthjustice.org about the 11 wonders of honeybees (click the link at the bottom of this post to read it). We’re completely dependent upon them for our food and everything IS better with BEES!
Did you know that bees are the only insect who can tell their fellow bees where to collect the best food? They do a waggle dance where they move their midsections at a specific angle as it relates to the sun. Then they indicate how far along that angle the food is by the length of time they do their waggle dance! Amazing. Now I know where the term “busy bee” comes from!
[Source]

 Not sure whether the SAT or ACT is better for your child? Join the club!
There are many factors to consider when comparing what test your child should take and it could take dozens of pages to describe them — and then you’ll really be thoroughly confused.
So, here are the general factors to consider:
Take the ACT if you:
Not sure whether the SAT or ACT is better for your child? Join the club!
There are many factors to consider when comparing what test your child should take and it could take dozens of pages to describe them — and then you’ll really be thoroughly confused.
So, here are the general factors to consider:
Take the ACT if you:
- Can read fast and still understand the concept while zipping through 60 questions in 60 minutes
- Have taken trigonometry and understand harder math concepts (imaginary number, logarithms, and advanced geometry)
- Are great at managing your time under pressure and can plow through straight-forward questions
- Prefer to guess on questions because you aren’t penalized .25 a point for guessing
- Have a strong vocabulary and strong reading comprehension skills
- Haven’t taken trigonometry or precalculus but can solve tricky word problems
- Get flustered with short time allotments for multiple-choice questions and prefer fewer questions even if they’re intentionally confusing
- Are a strong problem solver and critical thinker

 Let’s face it, there’s always room for improvement in any classroom, but when it’s your child in that classroom, you want things fixed NOW. We’ve all been there. But don’t go ballistic on the teacher. I know your mama bear instinct is to go straight to the teacher tell her what she’s doing wrong, but you’ll be alienating her and possibly ruining your kid’s experience in the classroom.
When your child comes home and tells you there was a problem in the class, listen intently, but don’t feed into his emotions. A friend of mine would pick up her 8-year old son after school and ask him, “So what did Miss “Meanie Face” do to you today?” Trying to please his mother’s voracious appetite for more stories about this teacher led her son to become so nosy about other students’ business that he fell behind on classwork because he was so focused on what Miss Meanie Face was doing and saying!
By listening to your child’s explanations you’ll hear how he felt about the situation. There is a big difference between how your child perceives a situation and what actually happened. Acknowledge his feelings and then ask objective questions. Try not to blame the teacher or other students – I know this is difficult to do when your child’s feelings have been hurt. Get the facts. Get the timeline. Get the names of the people involved. After you assess the situation, more often than not, you’ll find that there was no malicious intent – someone was just in the wrong place at the wrong time. In the future, don’t encourage your child to feed into this by asking more questions pointed at the target. Simply ask, “What interesting things happened at school today?”
But if the situation continues, consider one of the following solutions.
Let’s face it, there’s always room for improvement in any classroom, but when it’s your child in that classroom, you want things fixed NOW. We’ve all been there. But don’t go ballistic on the teacher. I know your mama bear instinct is to go straight to the teacher tell her what she’s doing wrong, but you’ll be alienating her and possibly ruining your kid’s experience in the classroom.
When your child comes home and tells you there was a problem in the class, listen intently, but don’t feed into his emotions. A friend of mine would pick up her 8-year old son after school and ask him, “So what did Miss “Meanie Face” do to you today?” Trying to please his mother’s voracious appetite for more stories about this teacher led her son to become so nosy about other students’ business that he fell behind on classwork because he was so focused on what Miss Meanie Face was doing and saying!
By listening to your child’s explanations you’ll hear how he felt about the situation. There is a big difference between how your child perceives a situation and what actually happened. Acknowledge his feelings and then ask objective questions. Try not to blame the teacher or other students – I know this is difficult to do when your child’s feelings have been hurt. Get the facts. Get the timeline. Get the names of the people involved. After you assess the situation, more often than not, you’ll find that there was no malicious intent – someone was just in the wrong place at the wrong time. In the future, don’t encourage your child to feed into this by asking more questions pointed at the target. Simply ask, “What interesting things happened at school today?”
But if the situation continues, consider one of the following solutions.
Find a Solution
Never go to the teacher to lay out the problem without having a viable, non-blaming solution on hand. That’s a sure-fire way to become the buzz in the Teacher’s Lounge! Being known as a Problem Parent will hurt both you and your child. Teachers are human, and remember, they’re underpaid, underappreciated, and overworked. So think about a solution to the problem. If students are distracting your son during class, suggest a seating rearrangement. If the students are confused about assignments, suggest using online programs like Infinite Campus or if your district can’t afford that, suggest the teacher use Google Calendar (free). Free is good! By offering solutions, the teacher will be more likely to address the issue and appreciate your recommendation.Get a Tutor
When teachers have between 20-40 students per class, it may simply be impossible for your child to get the extra attention he needs from the teacher. Even with volunteers aiding in the class, your child might need more help than they can give. Rather than stressing out because the school isn’t doing enough, hire a tutor to fill in the gaps. Ask your tutor to help with daily instruction and ensure that he is doing the work correctly. Then, they can review concepts taught at the start of the year to make sure that he didn’t miss any important building blocks – the foundation for future learning. Funds tight? Get a high school or college student to do it for community service credit!Take Trips
Sometimes, because government and religious organizations strip the interesting facts out of textbooks, your child’s history, literature, and even science courses can become kind of, well, dry. So supplement what your child is learning in the classroom with historically accurate movies and special museum exhibits. There are a ton of excellent movies that can make history come alive. Some of my children’s history favorites were “North and South“, “Centennial“, and “Shogun“. Have movie nights with other classmates/families and trust me, their interest in history will change! You can also center family vacations around visiting historical sites or museums. One summer, we went on a dinosaur tour of the 4-Corners in an RV with another family. While studying California history, we panned for gold in the Gold Rush hills of California. After writing papers on the Mayans, we travelled to Chichen Itza (Mexico) to explore ancient civilizations. And we even took a literary tour through England visiting homes of Jane Austen, Shakespeare, Bronte Sisters, and Charles Dickens. That certainly made reading English literature more engaging – my daughters quickly became voracious readers – and my youngest daughter even won a university reading contest while she was in high school! So if something is amiss in your child’s class, try to find a solution and be part of the process of fixing it.
 17-year old Omar was a passenger in a devastating car accident about a month ago. He broke 20 bones from head to toe and lost about 7 pints of blood. Basically, he’s lucky to be alive. The amazing ER docs and ortho surgeons at Stanford performed what seems like miracles. Omar’s dad called me with the bad news and I planned to see him after he got out of the ICU. When I went to visit him, I was planning on picking up his spirits and give him some hope, but instead, he enlightened ME.
I was feeling pretty pessimistic before I even got in the building, though. As I circled the hospital and several parking lots searching for a parking space for 15 minutes, I was angry with the hospital administration for not providing enough parking spaces for visitors. With each passing minute, I got madder and madder. Then, after FINALLY parking, just walking down the halls (that all looked the same) to find Omar’s room, I was frustrated that the nursing staff couldn’t find him and pointed me in the wrong direction several times. By the time I found Omar, I only had 5 minutes left before I needed to leave, and I was very annoyed.
What I saw when I walked into his room stopped me in my tracks, and all of my frustrations and annoyance evaporated, forgotten. I don’t know what I expected to find – I KNEW he was in a terrible car accident. I KNEW that a nurse at the first hospital (before Stanford) almost paralyzed him by moving his broken neck. Still, I wasn’t prepared. I saw my little Omar’s head encased in a metal frame (halo) – he couldn’t turn to see me as I walked in.
I wanted to hug him but he was in casts and cages. When I looked into his eyes and saw his sparkly personality beaming out at me, I noticed that the 2 screws that held his head in place were actually screwed INTO HIS SKULL. I almost lost it. I couldn’t take my eyes off the screws. I’m the kind of person who can’t watch movies or TV shows that have violence, blood and guts, or even just mild suspense. I fast forward through violent or scary scenes. When I have blood drawn, I need to lie down and stare straight up so I don’t see any needles or tubes of blood. So there I am, Omar’s college advisor, the one who was supposed to inspire him and tell him everything is going to be okay.
What happened next surprised me. Before I could say anything, Omar asked me how I was. He’d broken pretty much everything in his body there was to break and can’t go back to school for the rest of the year, and he asks how *I* am? Then he told me that he didn’t remember anything about the accident (a good thing!) and how grateful he was to have such a loving father who paid out of pocket to transport him to Stanford – a better hospital that he feels saved his life.
Never once did he blame the driver of the car or the nurse who almost paralyzed him. He wasn’t even upset that he was going to miss all of the senior highlights and graduation. Instead, he told me that his high school is allowing him to graduate and that he hopes to visit the school to see his friends later this semester. He glowed as he told me that he got into his first choice college and was still considering his second choice and other prestigious colleges. He told me what he learned from friends about exciting developments in computer science (his future major) and what he plans to develop in the future. He may have been physically broken, but he was intellectually and emotionally whole.
I was so taken by his genuine humbleness and positive outlook on life. Just 15 minutes before, I’d almost blown a gasket over PARKING. It took a 17-year old near-death survivor to remind me to reevaluate my priorities and look for the positive aspects in life. On the drive back, I thought about everything he said during our visit and I realized that he had ALWAYS looked at the bright side. The accident hadn’t taken that away from him. What a remarkable kid. I know he is going to fully recover and he’ll be an inspiration to others – just by being himself.
17-year old Omar was a passenger in a devastating car accident about a month ago. He broke 20 bones from head to toe and lost about 7 pints of blood. Basically, he’s lucky to be alive. The amazing ER docs and ortho surgeons at Stanford performed what seems like miracles. Omar’s dad called me with the bad news and I planned to see him after he got out of the ICU. When I went to visit him, I was planning on picking up his spirits and give him some hope, but instead, he enlightened ME.
I was feeling pretty pessimistic before I even got in the building, though. As I circled the hospital and several parking lots searching for a parking space for 15 minutes, I was angry with the hospital administration for not providing enough parking spaces for visitors. With each passing minute, I got madder and madder. Then, after FINALLY parking, just walking down the halls (that all looked the same) to find Omar’s room, I was frustrated that the nursing staff couldn’t find him and pointed me in the wrong direction several times. By the time I found Omar, I only had 5 minutes left before I needed to leave, and I was very annoyed.
What I saw when I walked into his room stopped me in my tracks, and all of my frustrations and annoyance evaporated, forgotten. I don’t know what I expected to find – I KNEW he was in a terrible car accident. I KNEW that a nurse at the first hospital (before Stanford) almost paralyzed him by moving his broken neck. Still, I wasn’t prepared. I saw my little Omar’s head encased in a metal frame (halo) – he couldn’t turn to see me as I walked in.
I wanted to hug him but he was in casts and cages. When I looked into his eyes and saw his sparkly personality beaming out at me, I noticed that the 2 screws that held his head in place were actually screwed INTO HIS SKULL. I almost lost it. I couldn’t take my eyes off the screws. I’m the kind of person who can’t watch movies or TV shows that have violence, blood and guts, or even just mild suspense. I fast forward through violent or scary scenes. When I have blood drawn, I need to lie down and stare straight up so I don’t see any needles or tubes of blood. So there I am, Omar’s college advisor, the one who was supposed to inspire him and tell him everything is going to be okay.
What happened next surprised me. Before I could say anything, Omar asked me how I was. He’d broken pretty much everything in his body there was to break and can’t go back to school for the rest of the year, and he asks how *I* am? Then he told me that he didn’t remember anything about the accident (a good thing!) and how grateful he was to have such a loving father who paid out of pocket to transport him to Stanford – a better hospital that he feels saved his life.
Never once did he blame the driver of the car or the nurse who almost paralyzed him. He wasn’t even upset that he was going to miss all of the senior highlights and graduation. Instead, he told me that his high school is allowing him to graduate and that he hopes to visit the school to see his friends later this semester. He glowed as he told me that he got into his first choice college and was still considering his second choice and other prestigious colleges. He told me what he learned from friends about exciting developments in computer science (his future major) and what he plans to develop in the future. He may have been physically broken, but he was intellectually and emotionally whole.
I was so taken by his genuine humbleness and positive outlook on life. Just 15 minutes before, I’d almost blown a gasket over PARKING. It took a 17-year old near-death survivor to remind me to reevaluate my priorities and look for the positive aspects in life. On the drive back, I thought about everything he said during our visit and I realized that he had ALWAYS looked at the bright side. The accident hadn’t taken that away from him. What a remarkable kid. I know he is going to fully recover and he’ll be an inspiration to others – just by being himself.

 Now that you’ve heard from all of the colleges that you’ve applied to, take a deep, relaxing breath. Feels good, right? Well, you’ve still got some work to do – now you need to choose the college you’ll attend in the fall — by May 1st. This is your final stretch to making that ultimate decision: where you will live and go to college for the next 4 years. For some, it’s a no brainer — you’ve been accepted to your #1 college and you’ve probably already sent in your deposit. Gold star for you! For others, you’re stressing out about making this big decision. And you’re definitely not alone. But here’s some advice to make that decision easier: first and foremost, don’t make decisions based on the name brand. So many students — and parents! — choose colleges based on prestige or legacies and later regret it. Don’t make that mistake!
- Majors/Programs
The single most important factor, arguably, is the major. Make sure your chosen college has the major or possible majors that you’re considering. Here’s why: One of my students was planning to major in business marketing and was accepted to UC Santa Barbara. She came to me to help her organize her four-year college plan for marketing. BUT, UCSB doesn’t offer a business marketing degree! Save yourself headaches and heartaches! Go online to compare your major at your top 3 colleges. Choose the college that has the best programs and opportunities within your intended majors.
- Costs/Financial Aid
Now that a college degree can cost more than $200,000, many families are choosing colleges based on financial aid. Public colleges are strapped for funds and offer very little by way of “free money”. Private colleges have more money thanks to big endowments, so their tuition costs to you may be comparable to a public college after considering their grants and scholarships. Carefully review your financial aid reports to determine your absolute bottom line costs. THEY CAN BE TRICKY! Call the financial aid department to get clarity on confusing reports. And most importantly, make sure that the financial aid they offer will be guaranteed for all 4 years! One student I work with received a handsome package for her freshman year but they rolled back their scholarships for the following year. Don’t get caught during your sophomore or junior year trying to negotiate financial aid. You’ll have less leverage and nowhere to go!
- Extracurriculars/Opportunities
When comparing your colleges, consider what opportunities they offer students in your major. Some colleges set up internships or study abroad programs specifically for your major. Choose a college with professors who engage with students outside of class and encourage them to get involved in their research. Make sure your college helps you move forward to higher education or guides you as you enter the work force. Some colleges actually set up interviews and even pay for flights and hotels! Learn more about your college BEFORE you hit the submit button!
- Social Life/Location
If you have the opportunity to visit the college before May 1st, do it! Check out their classes, dining halls, sports facilities, and dorms. Stay overnight to get a feel for the dynamics of the college to make sure it’s a good fit. If you don’t like the Greek system (fraternities and sororities), check to see how prevalent they are on campus before making your decision. If you’re hoping to make great connections through internships and networking while in college, you don’t want to be tucked away in a rural farming community (unless your network needs farming contacts, of course). Think about where your future jobs will be and choose a college that is closer to the connections you hope to make!
So here’s the bottom line: don’t choose a college just because of its prestigious reputation or because it’s your mom’s alma mater. Choose your future college because it is going to give you the most opportunities in your future career, offers the best financial aid package, and is located where you need to be to succeed!