 Gakkomom Pal Tim Niemier founded Ocean Kayak in 1971, after coming up with the concept of a sit-on-top kayak by taking the idea of a surfboard and carving out an area to sit and an area to store gear. He’s written a new book called “The Millionaire Beach Bum“, which is about how he turned his ADD into the engine that drove his work and career, and he is now sharing what he’s learned with the world. The following is an excerpt from his new book:
I grew up knowing I was different and was less able in some areas but focused on the areas where I excelled. I used those ADDvantages to create the company Ocean Kayak and introduce the sit on top kayak to the world while having the time of my life making millions.
HUNTERS AND FARMERS According to Thom Hartmann it is the difference between hunters and farmers. ADDers are in a way the hunters who can’t focus on doing repetitive farmer type work right in front of them, but are always scanning the horizon for something the farmers never notice. Then, like a (seemingly) lazy cat they spring into action and can go all-out with incredible endurance to get the prize. I KNEW I WAS DIFFERENT For me I found the academic world to be two-dimensional, where I always thought in 3D like sculpture or shaping kayaks. I could visualize the end of even my whole kayak business before I even started. Having the pressure to make decisions quickly meant there was no time to get distracted. Time for me was something that had to keep slapping me in the face to move quickly and decisively. Getting a network of people who were good at focusing to surround me in the business and managing to keep them paid made the team unstoppable. I sold my Ocean Kayak company but still have the goal of putting a billion butts in boats or boards (like SUP’s). THE EDISON GENE Thom Hartmann presents a case that since we know this personality type is genetic there must be a gene responsible. Thom calls it the “Edison Gene” after Thomas Edison. Now with genetic research that gene seems to be located and may have appeared about 40,000 years ago. At that time the climate was changing rapidly and dramatically and the humans that were willing to get up and go somewhere new survived while those that didn’t move didn’t survive. My family has had major moves at least 5 times in 6 generations. WHAT DO I DO WITH MY KIDS? What to do for you or your kids? Should you put them on meds? Can you survive? I do innovation coaching and speaking for companies, schools and individuals. I have mentored many kids like myself to help them find their special 3D strengths and teach them how to deal with a two-dimensional world.

Gakkomom Pal Tim Niemier founded Ocean Kayak in 1971, after coming up with the concept of a sit-on-top kayak by taking the idea of a surfboard and carving out an area to sit and an area to store gear. He’s written a new book called “The Millionaire Beach Bum“, which is about how he turned his ADD into the engine that drove his work and career, and he is now sharing what he’s learned with the world. The following is an excerpt from his new book:
I grew up knowing I was different and was less able in some areas but focused on the areas where I excelled. I used those ADDvantages to create the company Ocean Kayak and introduce the sit on top kayak to the world while having the time of my life making millions.
HUNTERS AND FARMERS According to Thom Hartmann it is the difference between hunters and farmers. ADDers are in a way the hunters who can’t focus on doing repetitive farmer type work right in front of them, but are always scanning the horizon for something the farmers never notice. Then, like a (seemingly) lazy cat they spring into action and can go all-out with incredible endurance to get the prize. I KNEW I WAS DIFFERENT For me I found the academic world to be two-dimensional, where I always thought in 3D like sculpture or shaping kayaks. I could visualize the end of even my whole kayak business before I even started. Having the pressure to make decisions quickly meant there was no time to get distracted. Time for me was something that had to keep slapping me in the face to move quickly and decisively. Getting a network of people who were good at focusing to surround me in the business and managing to keep them paid made the team unstoppable. I sold my Ocean Kayak company but still have the goal of putting a billion butts in boats or boards (like SUP’s). THE EDISON GENE Thom Hartmann presents a case that since we know this personality type is genetic there must be a gene responsible. Thom calls it the “Edison Gene” after Thomas Edison. Now with genetic research that gene seems to be located and may have appeared about 40,000 years ago. At that time the climate was changing rapidly and dramatically and the humans that were willing to get up and go somewhere new survived while those that didn’t move didn’t survive. My family has had major moves at least 5 times in 6 generations. WHAT DO I DO WITH MY KIDS? What to do for you or your kids? Should you put them on meds? Can you survive? I do innovation coaching and speaking for companies, schools and individuals. I have mentored many kids like myself to help them find their special 3D strengths and teach them how to deal with a two-dimensional world.

 My glucose numbers have been well within “normal” and my docs have told me that I’m the ideal patient. So what happened to me while in Las Vegas is what my nutritionist, Shoshanah Orzech, calls the perfect storm. I’ve been really good about sticking to my paleo diet. Shoshanah says that I’ve fine tuned my body so it runs like a Ferrari (not to be confused with looking like one!). No gluten, no grains, no dairy, no sugar and no legumes. And 29 hours in Vegas almost ruined everything!
As you know, getting to the airport was a harrowing experience, so when I arrived, I bought a bowl of delicious and comforting pea soup. Unfortunately, I completely forgot that peas are legumes – Oops! – and I inhaled the soup quickly as I boarded my flight. [Diabetic Demerit: 1]
After my presentation, I was super thirsty, so I gulped the only non-alcoholic drink I could find…which was (unfortunately) sugary lemonade. [Diabetic Demerit: 1]
Then, starving and wanting to treat myself after my presentation, I ordered a Philly Cheesesteak sandwich and FRIES. I was already full after just a few bites but I went ahead and ate the ENTIRE MEAL. [Diabetic Demerit: 5, and the Ferrari is on fire.]
When I woke up the next morning, my sternum throbbed and I was sure I was having a heart attack. I texted my daughter Nicole, an ER doctor, and asked her what I should do. As always, she suggested that I go to the Emergency Room, but I thought otherwise… I had 25 meetings lined up with international agents from 9:00 am until 5:30 pm – I couldn’t miss those! When I arrived at the conference, I wanted an egg but all they had were yummy baked goods. So I ate a muffin and had a cup of coffee – something I never eat or drink. [Diabetic Demerit: 1]
I was thrilled by the interest in Merit Academy and didn’t notice my discomfort. During lunch, I was proud of myself for not eating the white bread and croissants and just ate the delicious tri-tip. I even ate a salad! [Diabetic Demerit: -1, and a gold star!]
However, I couldn’t stand idly by and let my colleagues eat all of the gourmet desserts, so I caved in. I’m not even sure what those tasty, creamy delights were, but I’m sure they were pure white sugar and white flour. [Diabetic Demerit: 3]
I met such interesting people from all around the world. The time zipped by and when my last meeting ended, I realized that I had just 10 minutes to check out of my room and catch the shuttle (yup, the same company that had an accident on the way to the hotel the day before). That’s when my body started talking to me REALLY LOUDLY.
The ache in my sternum dropped to my abdomen, but I was still worried that I might be having a heart attack. In my delirious state of mind, I started thinking about how to find the UNLV Medical School and weighing the odds of me making it to Stanford’s ER (where many of Nicole’s classmates work). The pain was excruciating (for my level of excruciating, anyway – I can’t type with a paper cut, and there was also this time when I wouldn’t allow an ER doc to remove my bandage for 3 hours). So, I took 4 baby aspirin because I thought that that was a smart thing to do and then I downed some Tums. No improvement. [NOT A DOCTOR Demerit: 12]
When I finally landed in San Jose, I decided that I had indigestion (Did you know that I am a doctor? Seriously, doctors keep saying that to me). I decided not to go to Stanford and instead I drove home while gobbling even more Tums. I never knew that indigestion could be so painful. After checking online to see what home remedies could help deal with the acid trapped in my gut, I gulped a tablespoon of apple cider vinegar – yum! Actually, that was the worst tasting thing ever, but surprisingly, it gave me quick relief.
The next morning, I met with Shoshanah to see what caused this unbelievably painful and scary scenario. I needed another plan. We reviewed my food diary and she told me that I need a travel kit to help me when I am out of my element. She’s right, I will have my apple cider vinegar, nut balls, and a test kit so I can ward off future episodes of indigestion caused by eating ALL OF THE WRONG THINGS in a 24-hour period. But better yet, maybe I just won’t even go crazy like that again…

 You’ve probably been watching your “high-achiever” students scrambling to get in their Early Action and Early Decision applications and thinking you’re lucky you don’t have to deal with all of that stress. Well, it’s your turn if you’re applying to the California public universities only.
Start NOW so you don’t become one of the 100,000 students racing to finish their essays and submitting the UC applications over Thanksgiving break. Besides, wouldn’t it be nice to actually have time to enjoy that turkey and stuffing?
Every year, I have kids (and their parents) calling me at 5 minutes before midnight on Nov 30th with questions and problems about the application. The UC applications website https://admissions.universityofcalifornia.edu is now open and accepting online applications. The deadline is an absolute NOV 30th!
Here are some tips on completing them without stress:
- Open the application and fill in all of the personal, family and course information.
- Get your unofficial transcript to fill in course titles and grades (A mistake here can cost you admission to the college! Not worth the risk!)
- Ask your parents about their job titles, occupations, and college degrees. (You should know this but even my kids didn’t know how to fill this in…)
- List your activities and awards (up to 5 in each category) and include descriptive explanations for your awards, extra courses, etc. You’ll have just 150 characters and abbreviations are fine here. So put your best foot forward and see what you can write in 150 characters!
- Start working on your 2 personal statements. Both essays together need to be less than 1000 words and no fewer than 250 words for either of them. Here are the prompts:
- Describe the world you come from — for example, your family, community or school — and tell us how your world has shaped your dreams and aspirations.
- Tell us about a personal quality, talent, accomplishment, contribution or experience that is important to you. What about this quality or accomplishment makes you proud, and how does it relate to the person you are?
Make sure your personal statements answer the specific prompts. Tell a story to demonstrate your skills, talents, and passion. Ask someone to edit this for you but don’t let them write it or over polish it for you. It needs to be your voice – not a 50-something’s vision! Admissions officers can tell when parents or others write your essays, so don’t let them! These are difficult to write so start early.
Don’t send your transcripts unless the admissions office requests them. Send your SAT or ACT scores by the end of Dec. You can still take a Dec test and have them sent directly to the UC admissions office.
Don’t send resumes, letters of recommendation, brochures, artwork, or anything to the admissions offices unless you are specifically asked to do so.
Definitely don’t send cookies..this will not help your application, and may even hurt it.
Submit this application online before Nov 30th to avoid system crashes and slow processing time. You’ll need a credit card to pay for the application fee for each UC you apply to.
Hope this helps! Lay out each step and block off time to complete each task. You’ll very quickly see why you need to get started now. Good luck!
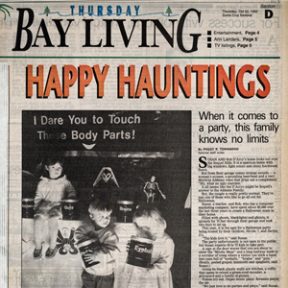
 I’ve always enjoyed Halloween because it isn’t a religious or political holiday – it’s just a WEIRD HOLIDAY and you get to dress up, do gross things, and have lots of fun.
Back in 1990, I took a month off from work to plan the biggest Halloween party for my girls. We turned our 3-car garage into a 75-foot walk-through maze.
I made signs for the driveway with my router, stuffed monsters for the maze, and made “feely cans” with disgusting body parts (grapes, manicotti, hard boiled eggs). The girls made ghosts and fluorescent bats. Ben Jammin’ made the most intricate spiderweb that spanned 8 feet and placed giant 2-foot spiders on it.
Jaclyn (18 months old at the time) couldn’t understand why her “baby” (doll) was up on the spiderweb. Nicole and her friends unwrapped hundreds of caramel squares for our caramel apples. Great memories! Two years later, the Santa Cruz Sentinel called us “Soquel’s Answer to the Addam’s Family!” on a cover story.
And that was just the beginning…


 Halloween is so much fun! What other holiday allows you to wear ridiculous costumes, transform your home into a haunted house, pass out candy to hundreds of kids, and make scary edible art?
Want to get your kids to eat something healthy before they head out to trick or treat? Make them MEAT LOAF MAN!
Another D’Arcy tradition.
It’s easy to make and guaranteed to make your dinner table fun on Halloween!
Here’s the recipe:
Meat loaf Ingredients:
2 lbs ground beef
1 cup bread crumbs
1 cup tomato sauce
1 Tbsp garlic salt
2 squirts ketchup
1 olive, bell pepper, or red pepper (tiny portion for facial features)
Mac ‘n Cheese Ingredients:
1 box packaged Mac ‘n Cheese (it’s the easiest and the kids’ favorite)
Directions:
- In a large bowl, mix the ground beef with the tomato sauce and bread crumbs.
- Add garlic salt.
- Grease a baking dish
- Make a 2” ball with the mixture to form the head and place at the top of the baking dish.
- Next, form the torso by taking the mixture and making an upside down 4” triangle.
- Then add 2 legs by rolling the mixture to make 2” logs.
- Now, connect the torso to the head by creating a short neck.
- Attach the legs to the bottom of the triangle to form the hips.
- Make the arms by rolling the mixture to make 2” logs.
- Form the arms to go up, down, or on the hip – you choose!
- Attach the arms at the shoulders.
- After all of the body parts are connected, shape Meat Loaf Man so it sort of resembles a man.
- Add eyes and a mouth by using a small piece of an olive, bell pepper, or red pepper.
- Bake in oven at 350 degrees for 15 minutes or until completely cooked.
- Make your kids’ favorite mac and cheese. Set aside to keep warm.
- When meatloaf is done baking, drain grease and pat the baking dish to remove any remaining fat.
- Pour mac and cheese around Meat Loaf Man to make him stand out.
- Place a knife (pate knife or corn on the cob prong) in Meat Loaf Man’s heart.
- Squirt ketchup around the knife and down the side of the chest – ewwwww!
- Call the kids to enjoy their “healthy” meal before they head out to trick or treat!


 Giving speeches has never been my thing. The students at Merit Academy have delivered beautiful speeches and the audiences have loved to hear them speak, so I have always handed over the microphone to them.
One time, I was asked to simply announce a dance group before a friendly audience but I couldn’t do it because my hands were trembling so hard I couldn’t read my speech! What a disaster!
So after my hilariously exasperating experience of just getting to the hotel in Las Vegas last week, I figured my speech to a room full of agents representing international students was going to be the icing atop the worst day of my life.
Seriously, how much worse could it get? I didn’t get to freshen up, I was thirsty and starving, and I didn’t know a single soul in the conference room. Expecting the worst, I just prepared for my slideshow and videos to not cooperate.
Then, as I looked out at the sea of guests, I noticed that half of them were nodding off or checking their phones. They were bored, hungry, and probably really jetlagged from flying in from Libya, Nigeria, India, China, Canada, Australia, and countries I had never even heard of before. I felt doomed. DOOMED!
That’s when I remembered my good friend Steve Mandel’s book, Effective Presentation Skills. He coached my daughters Nicole and Jaclyn before they gave speeches before the House of Representatives in Washington DC and at the Walt Disney Concert Hall, respectively. Those are some serious audiences, and I remembered a lot of what he told my daughters.
Throwing caution to the wind (and to wake up the audience), I decided to toss my notecards and just try to speak naturally about what I’m passionate about. After all, what did I have to lose?
What happened next blew me away.
I know my subject: Merit Academy, the school I founded in 1994 and continue to nurture into an amazing and successful school that offers one-on-one classes. All Merit Academy students, including my own daughters, became confident leaders both in college and in their chosen careers. To connect with the audience in front me, I just needed to address the problem I was there to talk about: helping international students become successful in high school and prepare them for success in American colleges.
So I walked up to the podium, put my notecards down and then walked straight into the audience (Internal dialogue: Nobody trip me, please!). One of the things Steve said was to not hide behind the podium or read what’s written on the slides. Instead, I talked about how the concept of American classrooms filled with teenagers is one of the most frightening learning environments for a foreign student. The foreign student is an outsider in a foreign country, and the instinct in that situation is to hide and avoid engaging.
This is not a good way to get a solid education. The audience perked up and actually listened, because I wasn’t just reading a slide, I was speaking about something they could relate to, and that the families they represented actually worried about.
I was fired up by the opportunity to talk about my solution to the learning problem (you can’t hide when you’re the only student in the class!), and this gave ME energy AND gave the jetlagged audience something to listen to. They were wide awake, they were alive and they were smiling. Even my competitors from other schools were nodding and agreeing with me. I looked at everyone and I kept their attention throughout my entire ad-libbed presentation.
I nailed it! Yes, the one who used to shake like a leaf and couldn’t even read her own speech. Thank you Steve Mandel for your words of wisdom.
This experience has humbled and transformed me.

 You know when you really plan something out – because it’s important that it be perfect – but then everything you meticulously planned goes totally wrong? That’s what happened to me last week when I planned a trip to Las Vegas to give a presentation at a conference.
I’ve written books on time management and organization. Heck, I’ve created packing lists for almost every conceivable situation (except maybe ice fishing in Alaska) AND I’ve coached people on how to minimize stress by planning ahead.
So I have no idea how things could have gone so wrong despite all of my experience and efforts to AVOID mishaps. Murphy’s Law was just out to get me, I think.
Here’s what went wrong between the time before I even left to before I got to the room where I was supposed to give my presentation:
- I packed my bags 4 days in advance so I wouldn’t forget anything. I then needed something I’d already packed, and while retrieving it, I broke a display case for brochures.
Internal Dialogue: Not a huge deal, but not a good start.
Stress level: 1 out 10. - I had to drive myself to the airport, because my husband told me THE MORNING OF MY FLIGHT that he couldn’t take me because he had a doctor’s appointment that morning.
Internal Dialogue: More annoying than anything else.
Stress Level: 2 out of 10. - At the airport, I parked in the hourly parking lot instead of the long-term parking lot.
Internal Dialogue: Ok, starting to get worried now.
Stress Level: 3 out of 10 - The shuttle bus from the airport to my hotel crashed into a bus.
Internal Dialogue: OMG EVERYTHING IS GOING WRONG NOW
Stress Level: 7 out of 10 - I couldn’t get off of the shuttle bus for 2 hours because of REGULATIONS, and I couldn’t just hop out and grab a cab because the accident caused gridlock. I was also trapped on the bus with a “comedian”. Could have been worse, though – could have been a clown.
Internal Dialogue: Maybe I can climb out the window and steal my own luggage…
Stress Level: 8 out of 10 - When I got to the hotel 30 minutes before the start of the event, I was told that I’d been booked into 2 rooms, and they couldn’t give me a key to one of them until they’d figured out what to do with the other one. It took them 10 minutes to figure this out, and I now had no time for a shower or even a quick refresh in the room.
Internal Dialogue: SERIOUSLY? Are you kidding me right now? Am I on Candid Camera? Is Alan Funt even still alive? If so, he won’t be for long.
Stress Level: 9 out of 10 - The event was at a hotel that had 37 different elevators that all go to different places, but only one that went where I needed to go: THE TOP. I got lost, of course.
Internal Dialogue: I am running in heels, and will need to give my presentation on crutches and WHY don’t all of the elevators go to the top floor?
Stress Level: 11 out of 10
I FINALLY made it to where I was supposed to be, just barely on time. As I walked up to the podium, however, I wasn’t nervous or stressed. I was simply grateful to be there at all!
Stay tuned for my next post about my actual presentation…

 I’ve been making this Rice Krispie Treat Witch for over 25 years. It’s a D’Arcy tradition. Now you can make it too! Here are the instructions.
Rice Krispie Treat Witch’s Head
Ingredients for one batch (2 batches for witch’s head and 1 batch for witch’s fingers):
3 Tbps Margarine
40 large (not jumbo) Marshmallows
8 cups Rice Krispies
1 box Black licorice
1 roll of Red Fruit Rollup
3 Sour balls or round candies for the eyes and warts
1 box wooden toothpicks
1 12-oz jar or can
12″ foil
1 12″-Witch’s hat
Instructions:
1. Cover the jar or can with foil.
2. Place it in the center of a display tray.
3. Heat the margarine over low heat in a large 4 quart stewing pan
4. When the margarine is sizzling, add 40 marshmallows.
5. Stir mixture over medium heat until marshmallows are completely melted with no lumps.
6. Add 2 cups of Rice Krispies and stir into the marshmallow mixture.
7. Continue to add 2 cups until all 8 cups are added to the marshmallow mixture.
8. Turn the heat off but leave the pan on the stove to keep the mixture warm.
9. With wet hands, grab about 1 cup of the mixture and press around the foil covered can/jar.
10. Keep pressing the mixture around the can/jar until it’s completely covered with Rice Krispie Treats.
11. Shape the top of the head with about 1 1/2″ of Rice Krispie Treats to make the top of the head round.
12. Then add Rice Krispie Treats to form the face and neck. Be careful to press with lots of pressure to hold the Rice Krispie Treats in place.
13. Add more thickness around the cheek bones.
14. Then add a 1/2 a cup of the Rice Krispie Treats to form the chin.
15. Do the same for the nose. Keep pressing hard to ensure that it will stay together at room temperature.
16. Put the witch’s hat on the Rice Krispie Treat witch to make sure it fits. Adjust your witch’s head accordingly.
17. With your thumbs, create the indentation for the eye sockets.
18. Give the face character by pulling in the cheek bones and forming the neck.
19. When you like the shape of your witch’s head, add the eye balls. Round hard candy works well. You can also cut licorice to create interesting shapes.
20. Cut red lips out of red fruit rollups or red licorice.
21. Place a black wart on the nose or chin by using a hard candy or licorice.
22. Use the melted marshmallows to “glue” the eyes, mouth and wart in place.
23. Attach the witch’s hair (licorice) with wooden toothpicks. Cut the toothpicks in half and secure the licorice around the top of the witch’s head. Make sure that the toothpicks are on top of the head so the witch’s hat fits over them. You can split the licorice in half (lengthwise) to make the hair thinner and to get more coverage.
24. Make additional batches of Rice Krispie Treats as needed to complete the witches head and to make witch’s fingers.
25. To make witch’s fingers, roll the Rice Krispie Treats into 1″ tubes and press them so they look mangled. (You can also make Rice Krispie Treat balls or squares)
26. Cut red nails out of red fruit rollups, and press hard onto the Rice Krispie Treat fingers to they stay in place.
27. Cover your witch’s head and fingers with clear wrap and place in the refrigerator until it will be displayed.
28. It’s best eaten at room temperature, so bring it out of the refrigerator about 30 minutes before serving.
Have fun and enjoy!
 I am one of those people who shudders at Christmas decoration displays and change stations as soon as I hear holiday music before Thanksgiving.
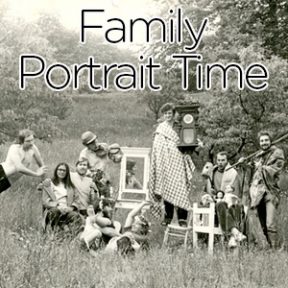
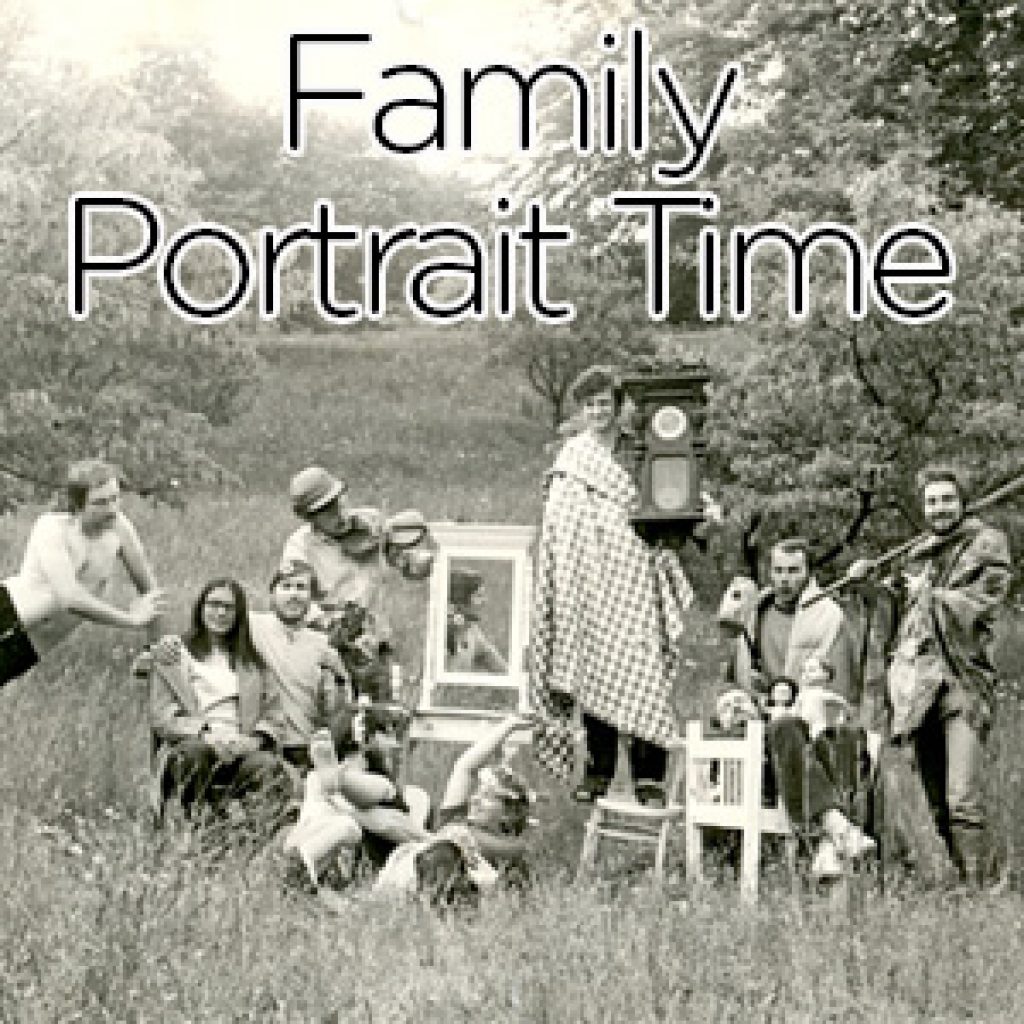
Just one holiday at a time, please! So I know it is counterintuitive that I am recommending that you take your holiday family portrait now. Yup, put it on your calendar or you’ll lose the window of opportunity to send out a great photo this year.
If your family is anything like mine, you’ve got kids living away from home with jam-packed schedules. I find it easiest to send a group email suggesting a few dates when everyone can gather for that — okay, I’ll admit it — dreaded photo shoot. Try to pick a date and time that might coincide with another reason to gather — like a birthday party or shopping date.
Then, make sure your camera batteries are fully charged and you have a memory card with plenty of space. Think about where you want this photo taken. If it’s outdoors, consider the time of day to make sure shadows won’t ruin your pictures. For indoor shots, set up your backdrop ahead of time. Consider bringing out your holiday decorations just for the photoshoot. And don’t forget your tripod, or ask a friend to shoot the photos for you. Selfies won’t really cut it here.
Don’t have time to set up a photoshoot? Then get a professional photo taken at a local photography studio, and let them handle the backdrops and lighting. Make sure to discuss the cost of the shoot and the costs for the photos before you set up your dates.
After you select the photo, order your holiday cards before Thanksgiving so you can send your cards out before 2016. You can also send e-cards to family and friends who have email addresses. Either way, update your mailing and email lists now before the holidays to avoid 11th-hour crises – nobody needs to have a nervous breakdown during the holidays!

 I fondly remember sailing the Californian, a tall ship, for 3 days on an Explorers’ Expedition with the Merit Academy 7th graders.
We worked the decks like they did back when the explorers sailed the seas, and the students took shifts manning the sails. We slept in bunks with the crew and ate in the galley just like they did in the 1400’s.
Our history teacher, Barbara Eastburn, says “I felt like Columbus and his sailors – far away from the comfort of land (the sight of land anyway) in search of new territory. I understand history in a way I never would have without this experience. I don’t know how exactly to explain it, but I felt more like a teacher on that trip than any other – even though I was not actually lecturing. It was the preparing for and sharing of the experience with the students.”
When the captain hollered, “All hands on deck!” at 6:00 am while we were fast asleep, the kids jumped out of their bunks and climbed up to work the sails. I sat up and brushed my hair and then started to apply some makeup (didn’t want to scare away my fellow mates!) when I heard the captain ask where I was. When I shouted up to him that I would be up on deck in a few minutes, after I “got ready,” he demanded that I drop what I was doing and get up there NOW.
I learned more about the explorers of history on that trip than I did by reading textbooks and watching movies.
So glad to have had the opportunity to take sail with the Meritans! Even if I had to swab the deck.
